Showing posts with label Tutorial. Show all posts

Saturday, August 21, 2010

Bleachin' T-Shirts!

So, I didn't quite share all of the photos that Stacy took at our Big Birthday Bash yet...in fact, I'm not even close!

Today I want to share with you the craft we did...all you need is;
  • Bright coloured t-shirts
  • Freezer paper (this isn't necessarily easy to find...I will be buying a roll from a local butcher soon!)
  • bleach
  • spray bottles
  • iron
  • cardboard
Start by choosing your design...we were having a Very Hungry Caterpillar Party so I obviously chose...
...Skulls and Crossbones for the boys?!?! (most of them are a little too old to be accepting of caterpillars!) And for the girls....
Don't you just love the colours of those t's. So, after you choose your image, cut it out of the freezer paper (I used my Cricut to do that part). Then you iron the paper onto the t-shirt shiny side down. I used a low no steam setting.
Look!!! It's a photo of me! Now, put the cardboard into the t-shirts before you start and double check that your image is secured...if you're like me they are coming undone and you need another quick iron.
Now here's the fun part! I put 1 part bleach to 3 parts water in the spray bottle and found it quite strong...make it 1 part bleach to about 5 parts of water and you will be good to go! (We do everything in the heat of the moment here...no practice runs!)
And spray...and try not to bleach your clothes! There is no need to saturate the t-shirt...just mist it and try to get some variation in the colour.
And then...watch the bleach dry. Cool eh?
You can take the image off once it starts to dry.
This is one of my favourite tees! I also love the photos! Try this at home and then share the photos on my Facebook Page!

*All photos in this post were taken by Stacy of Stacy's Creations Photography.

Saturday, July 10, 2010

Rainy Day Fun!

So, after Sarah & Sean's collaboration on the 'rainy day list' ended and Simon was tired of impersonating Mr. T something had to be done to make the kiddes all happy!

Simon had pulled out my silicone ice cube trays from Ikea so...we decided to make gummies! Apparently you can use chocolate molds or most anything to form the gummies but I like my ice cube trays...you also need jello, gelatine and some water.Pour the jello and gelatine over 1/3 of a cup of water in a small pot and watch the gelatine work it's magic for 5-10 mins (we went with 7 mins).
Boil and stir until the powders are dissolved. (see my molds in the background? That's what we used!)
Let the mixture cool for about a minute pour it into something with a spout (I love my pyrex measuring cups!)
Let set in fridge for about 10mins and voila! Homemade gummy candy!
And 3 kids that are a little happier 'cause we passed a little time together and they get a treat now! Just in case you are wondering, I got this fabulous ideas from one of my favourite places, Skip to my Lou.

Enjoy!
Heather

Sunday, July 04, 2010

Oh Canada! T-Shirts!

This blog post has been waiting to be written since July 1st! We are so busy here...going here and there and just catching up around the house and with a few projects...don't worry you will get to see them soon enough!

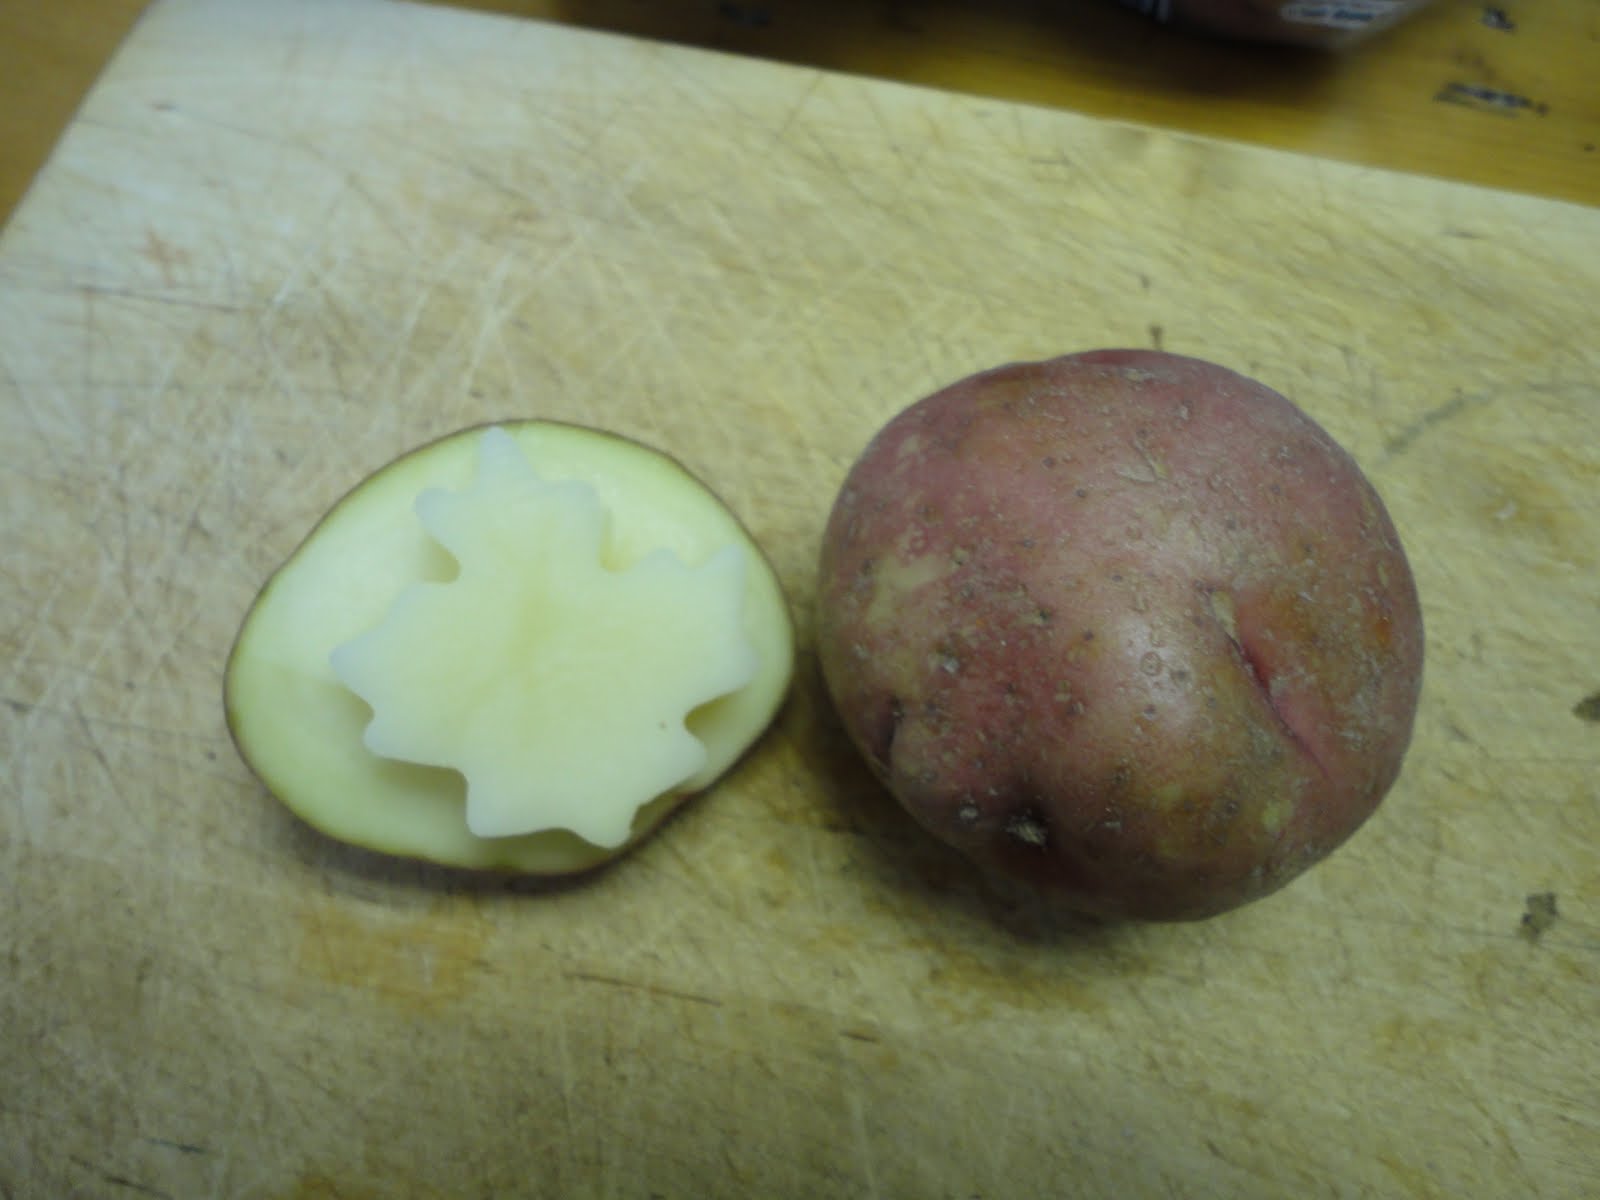
So, the other day I showed you our Canada Day t-shirts. Now I'd like to share with you how we made them. We used potatoes and cookie cutters to make the stamps...see I pressed the cookie cutter into the potato and then cut around the outside of the potato to remove the excess. This made it super easy to create the mold. I got the idea on Skip to my Lou (honestly, I could live at that woman's house!) We also tried the yo-yo balloons the other day...if nothing else it filled a little time and the kids had fun with them.
So there is one stamp. I made 4 so that we could use a few different colours.

Sarah insisted that her shirt had to match her pink skirt so we found a suitable pink to go along (I know, not super Canadian but she is a girly-girl what can I say?) The tutorial said to use fabric paint but since I don't have any, I used my regular paint (the kind you use on wood). I have tonnes of that! We used the same paint for our St. Patrick's Day t-shirts and they are holding up great!
So, apply paint to your stamps (we used a brush to try and get it on evenly and avoid globbing).
Plan your design and stamp away!
When we were done we then used the Freezer Paper Stencil method to put 'Canada' across the t-shirts. I got the idea from Skip to My Lou...but all you do is cut out the image or letters you want (I used my Cricut die-cutting machine), and iron the shiny side onto the t-shirt. Then paint away! We had to be careful doing the letters because they were small and in some cases delicate but they turned out great!
Peel off your freezer paper...
And voila! Oops! Look a little further down and you will see the girly-girl shirt!
Aren't they sweet? I mean the shirts, but the kids are too!
Now, that's how you celebrate in style! The kids LOVED making these! We will definitely revisit the potato print technique this summer!

Enjoy!
Heather

Thursday, November 15, 2007

Snowflake Tutorial

Well, I can't take credit for the design but I have yet to see an actual tutorial for this one so I put one together to share how we made the snowflakes on our gift cards last night...I just love it!!!

Here goes;

Supplies Required:
Paper: Whisper White, Vellum
Accessories: 2-Way Glue, Small Tag Punch, Large Tag Punch, snips

Step One:
Punch Whisper White with Small Tag Punch


Step Two:
Use Large Tag Punch to create a frame. Repeat Steps One and Two 7 times (create 8 frames)

Step Three
Glue 4 frames on vellum creating a cross with glue pen.

Step Four:
Layer second set of frames on the first set using glue pen. You may find it easier to create a template with 4 dark frames on light paper to ensure you get the second layer centred correctly.
Step Five:
Cut the bottoms off of the frames to create your snowflake.

Step Five:
Finish cutting out the Snowflake.
Step Six:
Place on desired project.

Saturday, September 29, 2007

Christmas Cards Vol V

This is a short volume but I just couldn't help myself...I have my 30 cards for $30 at 2pm so this has got to be quick!!!

I saw the tutorial for this card on Beate's Blog and just had to try it because it's just TOO cute! Imagine, you could use this to share a picture or a recipe...the possibilities are endless! Check it out!


How cute is that?!? Thank Beate for sharing!

Supplies;
Stamps: A Tree for all Seasons, Snow Burst
Ink: Basic Black, Soft Sky
Paper: Soft Sky, Old Olive, Celebration Wrapping Paper, Whisper White
Accessories: Stampin' Pastels, Aqua Painters, 5/8" Real Red Ribbon, Making Memories Buckle, Circle Punch, Scallop Punch, Tab Punch, Corner Rounder Punch

Enjoy!
Heather

Sunday, September 23, 2007

Hello, my name is Heather and I am an addict...

Well, I know I am not the first and won't be the last but sometimes I just can't help myself! Buttercup's homework this weekend was to create a treasure box...well initially I wanted to do a paper box (out of cardstock with a template)...DH said no...

We have some boxes from our move hanging so we were going to decorate one of those...well, we found a smallish box but the thought of decorating it made me sad...I knew it just wouldn't make the cut (well, my cut at least!)

The next thing I knew I spied DH's empty coffee can in the recycling (the large tin)...I don't know what came over me but it spoke to me! So, here is Buttercup's challenge! She choose the papers, stamps and embellishments (even the ink colour)...we had a great time! Buttercup can't wait for her day to show her treasure box!!!

So, here's the scoop!

Supplies;
Stamps: Doodle Alphabet
Ink: Pink Passion
Paper: K&Company (yes, from the same box...it's just too fun!), Whisper White, Pink Passion
Accessories: Crop-a-dile, Stickers, ric rak, Fiskars Circle Cutter and mat

Step 1
Cut 12x12 paper in half, glue to can (there will be a gap you can cover this with ribbon or another colour of paper - I recommend that you do this at the bottom so it doesn't interfere with the lid)

Step 2
Use your Crop-a-dile to punch holes in the can if you want a handle on the can (this makes a great drum now too!!!)

Step 3
Glue ribbon and other embellishments on tin (we used stickers from Michaels' and ribbon I had from some sewing projects)

Step 4
Cut second piece of paper into a 5" circle (I used a Fiskars circle cutter) and glue to the centre of the lid to cover the writing.

Step 5
Decorate your lid as desired. Buttercup loved stamping her name and glueing it all together...poor girl was worried about not centering the paper.

Step 6
Stop right there mom! This is not your project...but if it was, I would fill it with something fun...I will share some ideas with you later on (after Buttercup's special day) but for now it's filled with some of her small dolls to share with her friends at school.

Step 7
Find the right support group...because at this rate I am going to be doing homework soon!!!

Enjoy!
Heather

Sunday, September 16, 2007

Criss Cross Paper-Saving Tutorial

Supplies
5 1/2" x 12" Cardstock for your card base
5 1/4" x 3 3/4" Peice of patterned paper
5" x 4" Cardstock for insert
4 3/4" x 3 3/4" Neutral cardstock for insert
1 1/2" x 9" Coloured cardstock for card band
Adhesive
More paper for accents
Spiral Punch
Stamps
Ink

Directions

Step 1
Score 5 1/2" x 12" piece of cardstock at 3 7/8" and 8 1/8"

Step 2
Cut scored piece diagonally from center top to the outside bottom on both outside panels (see photos below)


Step 3
Cut patterned paper in half diagonallyStep 4
Glue patterned paper to the card front. I used doubled sided patterned paper and used a piece from either side.

Step 5
Add sticky strip to the bottom of the middle panel, as well as the bottom of the triangle flap that will be on top of the card.

Tape the card base together and set aside.

Step 6
Take the neutral cardstock for the insert and use the spiral punch on the left side of the paper

Step 7
Glue together


Step 8
Stamp and embellish your insert

Step 9
Score 1 1/2" x 9 1/4" piece of coloured cardstock at 2 1/2" and 6 3/4". Use sticky strip on one end to tape band together.

Step 10
Embellish your band and add to your card base.

Le Voila! The card is complete and ready for mailing!


Enjoy!
Heather