Tuesday, August 31, 2010

Cake Boss Mania!

Well, this is it...there only hours left in the Cake Boss contest at Redpath's Facebook page! I have been campaign this one hard! I am very close...just about 60 votes behind...it would only take 30 more people to close the gap...SO, if you have time...and you want to help a cake girl go see Cake Boss LIVE please take a moment and vote!

Voting closes at midnight EST tonight!

REMEMBER: you get 2 votes - one comment and one 'like' on my post

Step 1
Become a fan of Redpath Sugar on Facebook
Step 2
Go to my cake...please leave a comment and 'like' my post!!! http://www.facebook.com/photo.php?pid=6962333&o=all&op=1&view=all&subj=102228204484&id=697906146

Please enjoy some photos from when we made the cake for the contest...Simon was a big help for sure!


Enjoy!
Heather

Sunday, August 29, 2010

Summer Fun!

Wow! We are headed into the last few days of summer vacation here...the countdown is on! Last weekend I had a group of girls come celebrate their friend's 6th birthday! If there is one thing 6 year old girls love it's princesses!Here is one of the girls and her cupcakes...aren't they sweet!
A close-up of a cupcake...they turned out brilliantly! The girls loved making them!
We also did Shrink Art Keychains to accessorize their backpacks!
And Paper Princess Purses!
This is the birthday girl getting a big squeeze from one of her besties!
And finally, the kind of Mr. Potato Head we would all be happy to get! How funny is that???

Enjoy!
Heather

Monday, August 23, 2010

My Blessings...

This is my last post of photos from the Big Birthday Bash, I promise! But there were a few things that I wanted to share with you...and while I am doing some shameless self-promotion...did you all vote for me??? You can help me win a chance to see THE Cake Boss LIVE in Toronto!!! So become a fan of Redpath Sugar on Facebook and then leave a comment for my Pink Lemonade Cake Recipe. Please!!!!

Here I am with the love of my life...we haven't had photos take of the two of us since we were first married...so here we are!
There were some beautiful photos to choose from thanks to Stacy at Stacy's Creations Photography but I just love this one and how she made my apron pop!
...and this one of Sean is just delectable (if you ask me!)
Finally...the big #3! How could you not love that boy???
Can you believe this one? It's the last one, I promise...
If only they were that sweet all the time!!!

Enjoy!
Heather

Beach Bums @ work!

You know...there is nothing I love more than a great party! Things have been quiet here in the workshop lately as the beautiful weather means more BBQs and less time in the workshop. So, I was delighted to have a group of kids in yesterday...some of them have even been here before (I love that too!)

Of course, we made cupcakes...
And if you didn't already know...Shrink Art is one of my favourite things so we made key chains for the kids to put on their backpacks...
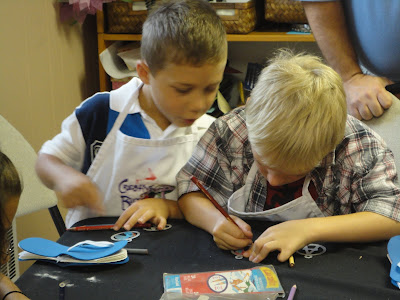
These 2 boys cracked me up...they got right into things when it was their turn!
And the oven shot...who knew that an oven could be one of the main events at a birthday party!?
It was a beach theme so we made flip flop books! They were fun to do with the kids but there was a lot of knot tying to be done!!!
We also made beach cupcakes but I didn't get a very good photo of those...you can see them here if you like!

Well, I'm off to do some baking and get ready for another party! We're gonna have a bunch of princesses in the house later today!

Enjoy!
Heather

Saturday, August 21, 2010

Bleachin' T-Shirts!

So, I didn't quite share all of the photos that Stacy took at our Big Birthday Bash yet...in fact, I'm not even close!

Today I want to share with you the craft we did...all you need is;
  • Bright coloured t-shirts
  • Freezer paper (this isn't necessarily easy to find...I will be buying a roll from a local butcher soon!)
  • bleach
  • spray bottles
  • iron
  • cardboard
Start by choosing your design...we were having a Very Hungry Caterpillar Party so I obviously chose...
...Skulls and Crossbones for the boys?!?! (most of them are a little too old to be accepting of caterpillars!) And for the girls....
Don't you just love the colours of those t's. So, after you choose your image, cut it out of the freezer paper (I used my Cricut to do that part). Then you iron the paper onto the t-shirt shiny side down. I used a low no steam setting.
Look!!! It's a photo of me! Now, put the cardboard into the t-shirts before you start and double check that your image is secured...if you're like me they are coming undone and you need another quick iron.
Now here's the fun part! I put 1 part bleach to 3 parts water in the spray bottle and found it quite strong...make it 1 part bleach to about 5 parts of water and you will be good to go! (We do everything in the heat of the moment here...no practice runs!)
And spray...and try not to bleach your clothes! There is no need to saturate the t-shirt...just mist it and try to get some variation in the colour.
And then...watch the bleach dry. Cool eh?
You can take the image off once it starts to dry.
This is one of my favourite tees! I also love the photos! Try this at home and then share the photos on my Facebook Page!

*All photos in this post were taken by Stacy of Stacy's Creations Photography.

Friday, August 20, 2010

Another year older...

Yep, it's that time...time for our Big Birthday Bash!
After much deliberation and waffling, we decided to go with a Very Hungry Caterpillar theme for this years Big Birthday Bash (this covers all 3 of our children). So here goes...
The theme is nothing without the book...Eric Carle was onto something for sure! I made the older kids 4+ the bookmarks you see hanging around the table and the younger ones got the actual book.A friend of mine made me these fantastic labels...you can find more of her work on Facebook or on Zazzle. I love her Allergy T-shirts...I will be ordering the lactose intolerant ones for our boys soon!
We played a little pin the caterpillar on the apple...the caterpillars were made by Little Bull as well but I made the apple with the help of my Cricut.And finally, the cake...errr, cupcakes!
The weather was a little funny but we managed to enjoy most of the party outside. All of the photos in the post were taken by Stacy's Creations Photography. You should totally become a fan of hers on Facebook (tell her I sent you!) she does some amazing work and it's fun to watch all the wedding photos and baby photos pop up in your feed!

Enjoy!
Heather


Wednesday, August 18, 2010

A sweet opportunity!!!

After careful consideration...Simon and I decided to share our Pink Lemonade Cake recipe to enter the Redpath Sugar Contest to see Cake Boss in Toronto! Yep, so you all better follow this link and 'like' and leave a comment on my post on Facebook here you can also find the post on my personal profile!!!Not only did Simon organize our containers, he also suggested a little extra lemon flavour in the form of dumping a lemon segment and some extra concentrate to the batter! I managed to scoop it out before anything was mixed in though!
Here are some cupcakes...
And a cake...
I like to add a little pink colouring to the batter for a nice contrast!
Here is the recipe...wait, did you vote yet??? I need you all to vote! Please!!!

Pink Lemonade Cake

2.5 cups cake flour

2 tsps baking powder

¼ tsp salt

½ cup plus 2 tbsp butter

1 1/3 cups Redpath Granulated Sugar

3 tbsps frozen Pink Lemonade

1 tbsp lemon zest

1 tsp vanilla extract

4 large eggs

1 cup milk

Preheat oven to 350F. Grease 2 8” round pans and line bottoms with parchment paper.

Sift flour, baking powder and salt in a medium bowl.

Beat butter in mixer until fluffy. Gradually add sugar, scraping as needed. Add concentrate, zest and vanilla. Add eggs one at a time. Beat until smooth.

On low alternate adding dry ingredients and milk (start and finish with dry ingredients).

Bake cakes about 25mins, until toothpick comes out clean. Cool.


Pink Lemonade Frosting

500g Redpath Icing Sugar

2 cups shortening (can mix ½ butter, ½ shortening if you like)

¼ cup Pink Lemonade Concentrate

1 tsp vanilla

1 tsp meringue powder

Water as needed

Whip shortening (and butter, if using). Slowly begin adding icing sugar. Alternate between icing sugar and concentrate to keep frosting light and fluffy. Add vanilla. Add water if needed for spreading consistency.

Frost cooled cake and enjoy!

Heather

PS Please help me win a day out in the city with THE Cake Boss!!!

Tuesday, August 17, 2010

Da na, na na na! Sugar, sugar!

Well, it's been quite a week! Here is the cake I left you with last time...in it's incomplete state...
Here is the fairy that I hand sculpted as a topper for said cake while I was at Klara Johnson's Cake School...
Here is the lovely lady sitting atop the toadstool I made...
And here is where she ended up...
You see after spending about 5 hours rolling, sculpting and painting I brought her home to my un-airconditioned house and wouldn't you know it? She became a little limp...well, okay...more than a little. She went to pieces.
Since we were meant to take this cake to a picnic, I got her on the cake, showed Sarah and quickly removed her again...it was too scary for me! She was SO fun to make though and in the meantime we will be looking for a door for my workshop and I have my DH convinced that a/c is a necessity in that room (if it's hot like this year, I can see the kids and I huddled in that room day after day enjoying the cool air!!!)

So, lesson learned...well a number of lessons learned! I also lost my bow and my swag neither of which I had gotten photos of yet!!! So, I think I will be making bows again just as soon as things cool down here!

Enjoy!
Heather

P.S. I totally forgot to reference the title of the post...apparently someone from Redpath Sugar has been watching my blog and is looking forward to seeing the results of this cake! That is pretty sweet if I do say so myself!

Sunday, August 15, 2010

Time keeps on slippin...

I can't believe we are half-way through August already! Today is Sarah's birthday! I don't have the cake altogether yet...you will have to wait for that but for now here are a few more photos from the last week...

Here is my hedgehog from cake school...this is before I finished him up...
And we did some Christmas inlay work...one of the students is Christmas Crazy...I promise you it isn't me but there was some Christmas stuff going on for sure last week!
This is a snippet of Sean's artwork for his bedroom...remember Sarah's artwork? He and I were working on it yesterday...we hope to finish up this week!
Finally a peak at Sarah's Cake...we painted the butterflies and learned a bit about piping during our week at cake school so I am hoping to put my learnings into practice!
Enjoy!
Heather